Showing posts with label recipes. Show all posts

2/12/14

Zucchini "Spaghetti" Low Carb Pasta Substitute- Dinner


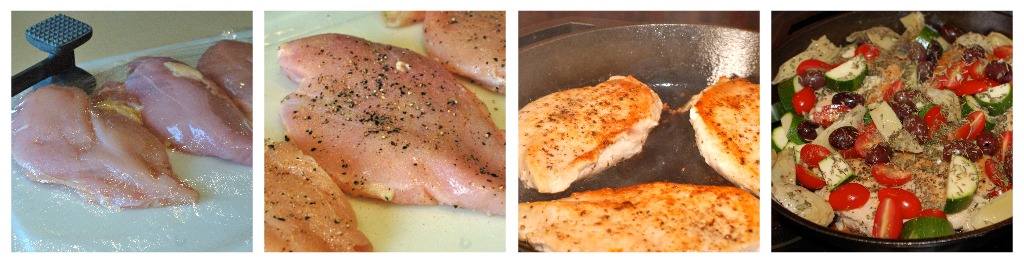
During my Whole Foods Market challenge I tried a few new recipes and one of them was Spaghetti Squash with Italian sausage  and it was delicious. Someone gave my husband a giant zucchini from their garden and I started thinking about the spaghetti squash and how yummy it was as a low carb and a nutrient dense substitute for pasta so I made Zucchini Spaghetti with meat sauce and it was really great! Another wonderful thing about using zucchini instead of spaghetti squash was that it is super quick to make and quick is always good.

The giant zucchini.

Quick work shredding in the food processor.

Zucchini "Spaghetti"
Recipe by: Simply Fit Mama
  • 1 giant zucchini or 3-4 regular size
  • 2 Tbsp Extra virgin olive oil
  • 2 cloves garlic, minced
  • Sea salt and fresh cracked pepper, to taste
Peel zucchini. Cut the zucchini in half and scoop the seeds out of each half. You should have little zucchini boats. Use your food processors shredding blade and shred away. If you don't have a food processor you can make zucchini ribbons with your vegetable peeler which will give you a wider "noodle". Or you can use a mandoline slicer with a julienne blade.

Heat your pan to medium-high heat (I used a medium cast iron skillet). Once your pan is heated add your oil and quickly add your shredded zucchini. Using tongs toss the zucchini a time or two then add the garlic, salt and pepper. I like this cooked al dente so don't walk away your zucchini "pasta" will be done in 3-5 minutes. If you leave it longer it will release water and get soft and a bit mushy. 


Now top with your favorite pasta sauce and enjoy!

1/24/14

Easy Chicken Dumpling Soup


Easy Chicken Dumpling Soup
recipe by: Simply Fit Mama

  • 1 1/2- 2 cups leftover Chicken, shredded, cubed (however you like it)
  • 4 carrots, chopped
  • 4 celery stalks, chopped
  • 1 medium yellow onion, diced
  • 2 cloves of garlic, minced - I use dorot frozen garlic
  • 8 cups chicken broth
  • 1 can Trader Joe's buttermilk biscuits 
  • 2 Tbsp extra-virgin olive oil
  • 1 tsp dried thyme
  • 1 bay leaf
  • 2 tsp chicken bullion
  • Sea salt and cracked pepper, to taste
Heat large pot or dutch oven over medium- high heat. Add olive oil and onions, heat until softened not brown. This takes about 4-5 minutes. Add carrots, celery, garlic and chicken. Stir for another minute or two. Now add the broth, thyme, bay leaf, bullion then cover the pot and let simmer on low for  45 minutes to an hour or until the veggies are tender. 

Now comes the fun part. Pop open the can of biscuits and lay them out on a cutting board. Cut the circles in quarters and then roll each one in little balls (this is great to do with the kids, practice fractions and fine motor skills). Add all the little balls to the pot of soup cover and cook on low-medium (simmering not boiling) for 7-9 minutes.


12/2/13

Turkey Meatball Stroganoff


I have really been in the mood for some comfort food lately. This is a healthier version of a traditional stroganoff. I don't use the heavy cream, I feel like the sour cream is enough to make this dish nice and cream without the extra fat. I love using good egg noodles like pappardelle instead of the traditional egg noodle. You can make your own turkey meatballs or use pre-made if you are short on time, just check the ingredients list before buying. 

Turkey Meatballs
created by: Simply Fit Mama

1 egg
1/4 cup finely chopped onion
2 cloves garlic, minced
1 Tbsp fresh parsley, minced
1/2 tsp sea salt, or to taste
3 to 4 turns of fresh cracked pepper, or to taste
1/4 cup bread crumbs
1 lb ground turkey breast

Preheat broiler. Spray sheet pan with cooking spray. 

Mix first five ingredients together in a medium mixing bowl. Once they are well combined add the ground turkey and bread crumbs. Lightly mix until combined, don't over mix. Next make meatballs into 2 inch balls.**If you give your hands a light coating of olive oil the meat won't stick to your hands** Place the meatballs on the sheet pan and into the oven for around 10 minutes, they should have a nice brown color to them.

Stroganoff Sauce 
created by: Simply Fit Mama

1 Tbsp extra virgin olive oil
1 small onion, chopped
1 8 oz. package of mushrooms, chopped
2 garlic cloves, minced
1/4 cup white wine
2 tsp flour
1/2 Tbsp Dijon mustard
1 to 1 1/4 cup beef broth
1/2 cup light sour cream

Heat a large skillet to medium heat. Add olive oil. Add onion and let them sweat a little until translucent 5-10 minutes depending on how finely chopped the onion is. Next add the garlic and mushrooms. Go ahead and add the wine now and crank up the heat to a medium-high temperature. This will reduce the wine. After the wine has evaporated from the pan turn the heat back down to medium and let the mushrooms brown up a little. Once the mushrooms have a little color add the flour to the onions and mushroom and stir it up so that it's combined.

In a medium bowl whisk together the beef broth, Dijon mustard and sour cream. Add this mixture to the skillet. Let it come up to a low simmer, where there are little bubbles at the surface of the sauce. You do not want to boil this sauce. Next reduce the heat to low add the meatballs and keep warm until ready to serve. 

Egg Noodles

Boil according to directions. While you are making the sauce you want the water boiling and ready to add the noodles. Drain the noodles and serve warm with the Stroganoff sauce and turkey meatballs on top.

Fight over the leftovers!

11/25/13

Chicken Tortilla Soup

This is a yummy soup recipe a friend shared with me about ten years ago. The original was delicious but it used mainly canned ingredients and cream soups. I have adapted this over the years to make a healthier but still very tasty and easy soup. This is my son's favorite soup.

Goodies on the bottom of the bowl

Soup ladled on top 

Mixed together...mmmmm

Chicken Tortilla Soup
Created by: Lori Smith
Adapted by: Simply Fit Mama
  • 1-2 Tbsp extra-virgin olive oil
  • 2 carrots, diced
  • 1/2 yellow onion, diced
  • 1/2lb - 3/4lb  leftover roasted chicken, shredded in bite size chunks, or poached chicken
  • 1/2 cup  diced tomatoes with green chili's (you could use rotels, I use Trader Joe's version because it's organic)
  • 1 1/2 32oz.  cartons of chicken broth or (6 cups) homemade broth
  • 1/2 cup flour  (you could also use corn starch or arrowroot)
  • Spices: 1/2 Tbsp garlic powder,  1/2 Tbsp chili powder, (to taste) sea salt and fresh cracked pepper 
  • 1 cup frozen peas
Stuff for the bottom of the bowl:
  • Shredded mexican cheese blend
  • Crunched up leftover tortilla chips (you know the stuff no one wants to eat because it's small and broken)
  • A dollop of sour cream
Heat a large soup pot or dutch oven on medium-high add olive oil and onions. Cook until translucent keep an eye you don't want burnt onion bits. Add the carrots and let cook for a minute or two. Turn your stove down to medium. Now add the chicken, flour and spices. Mix the ingredients until well combined. You want the flour to coat the chicken and veggies. Next add the tomatoes and chicken broth. Simmer for 45 minutes to 1 hour. In the last 10 minutes go ahead and add the frozen peas.

Get your bowls out and add a dollop of sour cream, tortilla chips and a little cheese. Ladle soup on top and then enjoy! 


I know a lot of people have tortilla soup recipes if you have a recipe that you love please share it in the comments below. 

7/28/11

Buffalo Chicken Lettuce Wraps | Dinner or Lunch

Craving hot wings?

This recipe will satisfy your cravings. This is a little healthier version of hot wings because it uses chicken tenders instead of wings with skin. They are not fried. I still use butter but just enough to give the buffalo sauce a hint of creamy butter.


Buffalo Chicken Lettuce Wraps
Recipe by: Simply Fit Mama

  • 1 1/2 lbs of chicken tenders, rinse and pat dry
  • 1/2 cup Red Hot hot sauce
  • 2 Tbsp real butter
  • 1/2 tsp garlic powder
  • Salt and pepper
  • Lettuce, rinsed and dried --Bibb or Boston lettuce is best but you could use romaine it just doesn't wrap as well...and you hold it more like a taco.
Blue Cheese Dip
Recipe: Simply Fit Mama
  • 1/2 cup nonfat plain greek yogurt
  • 4 garlic cloves, minced
  • 1/4 cup blue cheese
  • Salt and pepper


First the dip. Get a bowl and mix all the ingredients together. Don't be shy with the fresh pepper it complements the blue cheese very nicely. Cover the bowl and set in the fridge to let the flavors mingle.

Now for the chicken. Place chicken in a large dish with sides then give them a nice coating of salt and pepper on both sides. In a bowl melt the two tablespoons of butter either in the microwave or stove. Add the hot sauce and garlic powder. Mix together. Reserve half of the sauce for later. Pour the other half on top of the chicken tenders, make sure all sides are coated. Let it hang out on the counter for about 15-20 minutes while you preheat your grill to medium high heat.

Grill the chicken tenders till done. It takes about 6-8 minutes on the grill depending on how hot your grill is.

Assemble. Lay out the lettuce on each plate. Then add the chicken tenders, you can slice it or leave them whole. I liked them whole. Drizzle some of the reserved buffalo sauce on top of the chicken. Now add a dollop of blue cheese dip.

On a side note. This is not a super spicy buffalo sauce. When I make spicy dishes I like to make the kiddos plates a little different. For this dish I pulled aside the chicken and grilled theirs with just salt and pepper. I then put the sauces in little ramekins so that they can explore the tastes on their own and add what they like or leave it plain if that's what they prefer. I always give them the option to eat the big food flavors because I want them to not automatically assume they don't like something just because it's spicy or too grown up.

Here's what their plate looked like:


7/18/11

Beef and Veggie Kabobs | Dinner


Summer is really here and I have been brainstorming some easy and fun summer recipes. I want quick and easy recipes that the kids can easily help with. One of the first things that came to mind was kabobs. So I have come up with a handful of new kabob recipes. Who doesn't like food on a stick?

This is a wine based marinade but if you want to opt out of the wine part feel free to substitute beef stock. Also you can change out the veggies to what your family prefers. This is a great low-carb recipe without skimping on taste.

Beef and Veggie Kabobs
Created by: Simply Fit Mama
  • 1lb beef cut into kabob size chunks--sirloin, steak tips, tri-tip, etc.
  • Assortment of veggies cut in big chunks: zucchini, bell pepper, onions, tomatoes, mushrooms.
  • Skewers--if you are using bamboo/wood type make sure you soak them for an hour or so.

Marinade for beef
  • 1/4 cup red wine or beef stock
  • 1/4 worcestershire sauce--try to get an all natural or organic version traditional normally has some undesirable ingredients.
  • 2 Tbsp Extra virgin olive oil
  • 1 Tbsp Trader Joe's 21 seasoning salute
  • 4 Cloves of garlic, chopped
In a large ziplock bag add all the above ingredients and combine. Then add the beef. Next let marinade in the fridge for a couple of hours. You could marinate this overnight if you wanted to.

Get the kids to the counter with all those delicious veggies and let them skewer meat and veggies of their choice on the skewers. You'll be surprised at how adventurous they will be when they get to pick.

Preheat grill to medium-high heat and place the kabobs on the grill till desired doneness. I cooked mine around 8 minutes.

7/14/11

Grilled Italian Stuffed Peppers | Dinner


I've never been a big fan of green peppers until a couple of years ago. I really enjoy them now and love the smell of them cooked. I normally stuff bell peppers upright and cook them in the oven but since it's summer most I try to cook everything on the grill instead of the oven. My small kitchen can't handle the heat! 

I split these in half and laid them on their sides on the grill instead of upright mainly because I wanted a charred skin on the bell peppers. The end result was delicious.

Grilled Italian Stuffed Peppers
Recipe by: Simply Fit Mama
  • 4 green peppers
  • 2 Tbsp extra virgin olive oil
  • 1 small onion, chopped
  • 8 oz. package of mushrooms, chopped
  • 4 cloves of garlic, chopped
  • 1lb ground beef
  • 3/4 cup tomato sauce
  • 1/2 tsp garlic powder
  • 1/2 tsp oregano
  • 1/2 tsp thyme
  • 1/2 tsp basil
  • 1/2 tsp red pepper flakes--if you want a little kick
  • Salt and Pepper, to taste
  • Fresh mozzarella slices--I did not have any and just used a cheese blend but mozzarella slice on top would be superb!
Heat a pan on the stove to a medium heat. Add 1 Tbsp of the oil once the pan is hot. Now add the onions and let them cook until translucent and soft, a couple of minutes. Add the chopped mushrooms to the onions and let them cook until they reduce in size, about 4 minutes. Now you can add the garlic let it cook for another minute with the veggie mixture. Pull the pan off the heat and transfer the veggie mixture to a bowl. 

Place the pan back onto the stove and let it heat up again. Add the rest of the oil and brown the ground beef. While the beef is cooking start prepping your green peppers. Cut them in half. Then you need to remove the stem, seeds and ribs of the pepper. When you are finished with that lightly salt and pepper the insides of the peppers. Your ground beef should be almost done.

Heat your grill to a medium heat. Once the ground beef is cooked add the veggie mix back and add all of the seasonings and tomato sauce, mix well. Also make sure to salt and pepper to taste. 

Stuff each pepper accordingly with the meat. I make sure to under stuff the kids peppers because they don't eat as much as we do and the extra goes to waste. Once the peppers are stuffed add your desired cheese on top ( I hope you pick fresh mozzarella!) then take them to the grill. 

Now that the grill is nice and hot turn the heat all the way to low. Place the peppers on the top rack, close and come back in 8-10 minutes to pull them off the grill. If you don't have a top rack turn the heat off on one side of your grill and put the peppers on the unheated side but keep the heat on the other side closer to medium.

Another easy way to enjoy these peppers is to use leftover spaghetti with meat sauce instead of having more leftover spaghetti.

Enjoy!

7/7/11

Over Medium Eggs with Salsa and Avocado | Breakfast


This is currently my favorite everyday breakfast. It's quick it takes around 5 minutes to make and the flavors are wonderful. This is a filling breakfast because of the protein and the good fat from the avocado.

Over Medium Eggs with Salsa and Avocado
Recipe by: Simply Fit Mama

  • 1/2 Tbsp coconut oil - or oil of your choice, if you use coconut make sure it's unrefined organic coconut oil
  • 2 large eggs
  • Your favorite salsa - Currently my favorite is the Serrano salsa at Trader Joe's it's by the hummus.
  • Half an avocado sliced
Get your pan heated to a medium heat. Add the oil now crack each egg in the oil. Keep them separate so that you can flip them easily. Salt and Pepper. Let the whites set up and then take a fork or spatula to the yolk and just break it a bit. Then flip the egg and lightly salt and pepper. Let it cook for just another minute and then transfer to a plate. This will give you an egg with a soft yolk that is not runny or hard.

Add your salsa and avocado to the top and enjoy! 


6/30/11

Oven Roasted Greek Chicken Breast | Roasted Greek Veggies


Or it can look like this...

if you don't like everything stacked. 

This is a pretty easy dinner and it's very flavorful with little effort. It's also a great way to use some of the summer veggies. So without further ado here is the recipe:

Oven Roasted Greek Chicken Breast with Veggies 
Created by: Simply Fit Mama
  • 2lbs  Chicken breast--I used skinless boneless because it's what I had on hand but you could use thigh meat or bone in chicken breast too, whatever floats your boat.
  • 2 Tablespoons of Oil-- I use coconut oil you could use olive oil just watch it and make sure it doesn't smoke when you brown the chicken.
  • 2- 3 Zucchini, cut into 1/2 inch- 1 inch pieces--If they are too small they will get mushy in the oven.
  • 1 cup  Grape tomatoes, cut in halves--any small tomatoes or big ones cut into smaller chunks.
  • 1 cup Kalamata olives, pitted and left whole
  • 3-4 cloves of garlic, roughly chopped
  • 3/4 cup marinated artichokes, drained and rinsed
  • 1 lemon
  • 1/4-1/2 cup Chicken broth--1/2 a cup if you like more juice at the bottom...yummy
  • Seasonings: Salt and Pepper, Garlic powder, 1/2 Tbsp each of the following Oregano, Thyme, Rosemary.
  • Feta Cheese 

Preheat oven to 400 degrees.

Get your chicken rinsed and patted dry. Lay it on your chopping board and put a sheet of saran wrap over the top and pound out the thick part of the chicken. You're not making it super thin just even with the thin part so it cooks evenly in the oven. 

Next get rid of the saran wrap and give the chicken a good dose of salt, pepper and a light sprinkling of garlic powder. Do this for both sides. While you are doing this get an oven safe pan or dutch oven heated on the stove set it at a medium to high heat.

Add your oil to the pan once it is heated. Now place your chicken in the pan and brown each side (it takes me about 2-3 minutes per side to get a golden brown)

While your chicken is getting a nice tan you can take a large bowl and put the zucchini, tomatoes, olives, artichokes, and half of the lemon juiced, garlic and herbs and mix it all together. 

Once your chicken is golden pull it off the burner and add all the contents of the bowl plus the chicken broth. (You can skip the bowl step above if you don't want to dirty a bowl and just throw everything on top of the chicken, the herbs get better distributed if you combine them first, but I skipped the bowl and it turned out great) 

Put the pan in the oven and let it cook for around 15-20 minutes for boneless skinless breast, bone in I would say 35-45 minutes. If you don't have an oven safe pan (or it's not big enough) you can still make this recipe just after you brown the chicken place everything in a 13x9 dish.

Once your chicken is done make sure to let it rest for 5-10 minutes so you don't loose the juiciness. I like to use the other half of the lemon at the end before serving to brighten up the flavor a bit. Plate your food and add the feta cheese on top as desired. 

Enjoy!

3/26/11

Delicious Dream Bars

I don't bake sweets that often. Probably because I can't seem to control myself around them...seriously I can't. My husband asked me to bake some goodies for a bake sale that his work hosted to raise money to donate to the Red Cross Japan Disaster Relief.

We decided to bake a batch of Oatmeal Chocolate Chip Cookies and Delicious Dream Bars. My mother-in-law gave me this recipe a long long time ago and I love when I get a chance to whip up a batch. They are fun and easy to make and they are always a hit.


Dream Bars
recipe by: Elaine Forward


Ingredients for the bars:
1/2 cup butter softened
1/2 cup brown sugar
1 cup flour

Ingredients for the topping:
2 eggs, beaten
1 cup brown sugar
1 tsp vanilla
2 tbsp flour
1 tsp baking powder
1/2 tsp salt
1 cup shredded moist coconut
1 cup of nuts (walnuts or pecans--we usually omit the nuts my husband doesn't like them)

Preheat oven to 350 degrees.

A 13x9 pan works great for this recipe or a bar pan.

Bars:
Mix butter and sugar until combined and then add flour and mix. Take this dough and flatten it on the bottom of the un-greased pan. Bake for 10 minutes.

Topping:
Mix eggs, sugar and vanilla. Add flour, baking powder and salt and mix until combined. Stir in coconut and nuts. Now spread topping on top of bars. Bake for 25 minutes.

Cool and cut into bars.

2/23/11

Poached Chicken- Not rubber chicken!

Do you have a bad image of poached chicken in your head? I know I did for the longest time. Anytime I made "poached" chicken it had a rubber like consistency. Not very tasty. I stopped trying to poach the chicken and kept grilling, baking and pan searing because that's easier and tastier for me.

Then I figured out how to poach chicken a better way. What I've learned is that I used to boil my chicken not poach it. Boiled chicken is chewy like rubber. Poached chicken is tender and moist.

Poached chicken is a great way to get ahead of your week with very little effort. You can use this chicken for so many things here are a couple of examples: chicken salad sandwiches, chicken on a salad, stuff it into tortillas for burritos or enchiladas, use if for a quick pasta dinner, etc. It also freezes well! It's also a very low fat and low sodium way to cook chicken.

Place desired amount of chicken breast in a heavy bottomed pot.

Cover your chicken with water or broth and make sure it's completely covered. 
(I added more water after this picture.) Add your herbs and seasonings.

Bring the water to a boil and then reduce the heat quickly to a simmer. You will want to simmer for 10 minutes with the pot partially covered. Now turn the heat off and let the chicken hang out in the pot for about 15-20 minutes.

Let cool a bit and then cut it up however you would like. You could use it immediately, put it in the fridge for later in the week or freeze it for later in the month.

Poached Chicken
recipe by: Simply Fit Mama


Chicken breast (In the photos above I used 2 pounds of chicken)
Water or Chicken broth
1 bay leaf
dried herbs (I use oregano, rosemary, thyme around a teaspoon each herb or more if you like.)
3-5 whole peppercorns

Using a heavy bottomed pot (to help retain the heat), place chicken at the bottom. They should not overlap. Keep them in a single layer.

Cover chicken with water or broth and add the bay leaf, peppercorns and any herbs you would like.

Bring the water to a boil and then reduce the heat quickly to a simmer. You will want to simmer for 10 minutes with the pot partially covered. Now turn the heat off and let the chicken hang out in the pot for about 15-20 minutes.

Let cool a bit and then cut it up however you would like. You could use it immediately, put it in the fridge for later in the week or freeze it for later in the month.

1/7/11

Homemade Croutons


Homemade Croutons 
If you haven't made croutons before you are missing out! I save the ends of the fresh artisan bread, have you made this yet? I put all the ends in a ziplock throughout the week. I make bread crumbs and store in the freezer or croutons with the ends of the bread. Make them, you won't be sorry. 

Okay enough talk, here's how I make them:
  • Old bread pieces cut into cubes
  • Extra-virgin olive oil
  • garlic powder
  • cracked pepper
  • dried herbs (your favorite)
Heat oven to 275 degrees. Now this is not an exact science so no measurements. Grab a cookie sheet and put the cubes on the pan. Drizzle the olive oil on top of the cubes, not too much you don't want them drenched. Toss the cubes around to incorporate the olive oil. Now sprinkle all the seasonings on to taste, toss the cubes again. Put the sheet in the oven and bake for about 10 minutes, it should start to smell really yummy. Open the oven and toss the cubes again and bake for another 10 minutes or so, until crunchy.


Simple Lasagna


Lasagna is one of the first meals I made for my husband. He loves it. I love to make it for him. I don't make it often because I am a full fat cheese kind of girl and if I ate lasagna every week my heart would probably stop from all the cheese loaded in my lasagna. 

So beware that this is not a low-fat version but it's a delicious and wonderful treat every now and then. Since my husband and son started back to work and school, respectively, I made this as a special dinner.

This is a great recipe to double. You could cook one and freeze the other. Then you will have dinner down one night down the road or dinner to give to a friend.

Simple Lasagna 
Created by: Simply Fit Mama

1 box lasagna noodles--you can use boil or "no boil" whatever you prefer
1 lb lean ground beef
1 jar of marinara sauce--your favorite I like to use Trader Joe's Organic Marinara
1 15oz ricotta cheese 
1/2 cup of good grated Parmesan cheese (not the green can people), divided
1/2 Tbsp dried oregano
1 Tbsp garlic powder, divided
Sea Salt and fresh pepper to taste
1 egg
1 bag of mozzarella cheese

Preheat oven to 375. 

I like to use the boil noodles so if use those noodles get a pot of salted water boiling first. Brown the ground beef in a large skillet. Drain off any fat in the skillet return to the stove. Next add 1/2 Tbsp garlic powder and salt and pepper to taste. Now add around a quarter of the jar of marinara. You just want to get a nice coating of sauce on the beef, you don't want the beef floating in sauce. Turn off the stove and set this pan aside.

Add your noodles to the salted boiling water. Set your timer so you don't forget to get the noodles out before they overcook. You want the noodles to be al dente. It takes about 7-8 minutes. Drain the noodles and rinse with cold water. Now drape the noodles on the side of the pot so that they don't stick together in a big clump. If you are using no boil you can skip this step.

Take a medium mixing bowl and add all the ricotta cheese, 1/4 cup grated Parmesan, 1/2 Tbsp garlic powder, 1/2 Tbsp dried oregano, salt and pepper and 1 egg. Mix this all together until it's combined.

Now get out your pan. You can use a 13x9 for a thinner lasagna or an deep 8x8 for a thicker lasagna. Pour a little marinara sauce on the bottom of the pan so that the noodles don't stick. Now start making the layers. Start with the lasagna noodles, ricotta cheese mixture, ground beef, a handful of mozzarella cheese and repeat. When you get to the final layer of noodles spoon some marinara on top of the noodles (like your making a pizza) then add some Parmesan and finally top with a good layer of mozzarella cheese.

Go ahead and cover the pan with foil. Bake for about 30-35 minutes and then remove the foil to let the cheese on top bubble up and brown a little. Total bake time 45 minutes. 

Try to let the lasagna rest for 10-15 minutes so that it will be easier to cut.

12/1/10

The Real Food Diet Cookbook review and GIVEAWAY

I'm not a big fan of diet books in general and when I was asked to review this new "diet" book I was hesitant. I took a look at Dr. Axe's website and I was intrigued and my hesitation dissolved. I really found his website overflowing with sound health and nutritional advice. This book is less of a diet book and more of a nourishing your health through food book. The last week and a half I have been trying new recipes from this book.

The Real Food Diet Cookbook by Dr. Josh Axe

The beginning of the cookbook is filled with great nutritional advice. Dr. Axe breaks down nutrition into easy to digest information:
  • real vs. fake food
  • explanation of nutrient density
  • the real food pyramid vs. the standard food pyramid
  • five best real foods 
  • five worst fake foods
  • a great explanation of sugars, fats and oils
  • healthiest milk and dairy
  • cooking tips
  • label reading
  • cooking equipment
  • glycemic load --eat this not that section is good
My favorite statement in the whole book is this:

QUALITY OVER QUANTITY
  • Stop counting calories.
  • Stop counting fat.
  • Stop counting carbs.
  • Stop measuring every last portion on your mini-scale.
  • Start focusing on eating quality food.
If you are just starting out on your real food / whole food journey then this would be a good book to get you started, mainly because of the first part of the book. 

If you have been eating with a real food / whole food concept for a while then some of this information will be stuff you already know.

Another nice feature of this cookbook is that the majority of the recipes had color pictures to accompany them. I liked that. 

Here are a few of the recipes I have tried:

Chai
This was a nice warm fall drink that uses almond milk. I enjoyed it and my kids did too. I plan to give this  to them  after they come in from playing in the chilly fall weather.

Almond Berry Cereal
I had high hopes for this cereal because it looked soo good but I didn't really like it. It had a paste like consistency  which was not very appealing. I still ate about half of it because I was hungry and didn't want to waste the food,  it was a very filling breakfast. I loved the coconut milk which I have never had before. The coconut milk was nice and creamy. Because of this recipe I plan on trying coconut milk in other ways.

Spinach Salad with Spiced Nuts
I actually made this salad for Thanksgiving. It was delicious and wonderful combination of flavors.  Since I had all the ingredients on hand I ended up making it a couple time during the weekend. It was good!


This morning I threw all the ingredients in the crock pot for the Crockpot Turkey Stew from  Dr. Axe's cookbook. I have just a little bit of turkey leftover so I thought I would give this recipe a try. 

Crockpot Turkey Stew
*recipe provided with permission from author.

2 lbs. boneless, skinless turkey (breast thighs, legs, etc.)
1 med. leek, sliced
2 stalks celery, chopped
2 tsp. thyme leaves
1 tsp. oregano leaves
1 tsp. Italian seasoning
1 c. winter squash, peeled and cubed
1 med. carrot, chopped
1 cinnamon stick
1 16 oz. can organic tomatoes
1 32 oz carton of chicken/turkey/veggie broth or water
  • Place turkey, leeks, celery and spices into crock pot. Turn on high and saute until leeks become translucent. (I did this in a skillet on the stove)
  • Add squash, carrots, cinnamon stick, tomatoes, water or stock and simmer covered for 2-3 hours on medium or 6-8 hours on low.
  • Remove cinnamon stick just prior to serving.
The turkey stew was yummy. The winter squash was a nice addition and the cinnamon stick made the house and stew smell delicious. The cinnamon didn't read sweet it actually added a little kick. The kiddos loved it probably because it smelled delicious. My husband did not like it but I thought it was good.

Giveaway!
As I mentioned in the title this is also a giveaway. When they sent me this book to review they were kind enough to send me one for my readers (that's you!). To enter the giveaway here's what you need to do:
1. Leave a comment at the bottom of this post.
2. Twitter about this giveaway.
 (come back and leave a comment re: tweets). 
3. Post a comment on Facebook about this giveaway. 
(come back and leave another comment re: facebook)

So that is three ways to enter. The giveaway is open until midnight tomorrow,  December 2nd. The winner will be chosen by random.org. I will announce the winner on Friday morning, December 3rd.

Salmon Burgers and Roasted Potato Wedges


I had planned this dinner for Sunday but I ended up having a pretty busy errand day yesterday and just didn't have enough time for the pot roast.

I have a couple great recipes for salmon burgers but while I was shopping at Whole Foods I ran across these Salmon burgers in the frozen seafood section so I grabbed them and figure I will make the handmade ones another time.

The Whole Foods frozen salmon burgers were yummy. Not as good as freshly made salmon burgers but great taste for a quick meal.

Just in case you were hoping for a Salmon burger recipe here it is:

Salmon Burgers
Recipe by: Simply Fit Mama


1 (14.75 oz.) can salmon, drained and flaked
1 egg, beaten
1/4 cup coconut milk (unsweetened) or milk
2 tbsp finely chopped yellow onion
1 garlic clove, minced
1 tsp dried Italian seasoning blend (my favorite Yah's Best)
1/4 tsp fresh ground black pepper
1 tsp sea salt
1 tsp garlic powder
1 tsp lemon zest
1 tsp panko breadcrumbs or any other you have on hand
1/2 tbsp fresh chopped Italian parsley
1 tbsp coconut oil


Combine all ingredients except the coconut oil and mix well. Form into 4 burgers about 1/2 inch thick.

Heat a skillet over medium heat add the coconut oil. Next add the burgers and cook 5-6 minutes on each side. Do not mess with them give them a chance to brown before you flip.

The recipe for roasted potato wedges can be found here. I omitted the fresh garlic I didn't want the wedges to overpower the salmon burgers.

11/25/10

A little Thanksgiving preparations


Okay maybe not a little, I've spent most of the day preparing for Thanksgiving tomorrow. It hasn't really been stressful I've just been busy getting things done so that tomorrow I can relax and enjoy company.

I don't always get to cook Thanksgiving dinner. Most years we have been blessed to make it to Illinois to visit with family, this year it just wasn't in the cards.

I do love to cook holiday feasts! And it's even more fun when you get to have people over to enjoy the spread together. This year my Dad will be here and our neighbors who happen to be our friends. :) The kiddos love playing with their kids and even though there is an age gap they all seem to get along really well.

I used to stress out about big meals even though I really enjoyed cooking them. I just couldn't get it out of my head that things didn't have to be "perfect". These days I don't worry about perfect I'm just happy if the kiddos remember to flush. Sad but true.

Seriously though, it's much better to focus less on things being just right and focus more on enjoying the time you have with friends and family.

I keep my menu for Thanksgiving simple; it really hasn't changed much over the years. It's not very low fat or that healthy but it's fun to have a yummy sinfully delicious meal a couple times a year.

Here's what's on the menu:


Mashed Potatoes (made with heavy cream, butter and cream cheese )

Sweet Potato Casserole

Haricot Vert with mushrooms

Corn Bread Stuffing

Baby Romaine salad with goat cheese and cinnamon almonds

Artisan bread (whole wheat and white)

Dessert brought by our friends:

Apple Pie

Pumpkin Pie

So if you are the one cooking the feast tomorrow I hope you don't stress. It's just food. So what if your turkey turns out a little dry or you forgot to buy cream cheese. It's just food. Add a little extra gravy to the table. No biggie. Love on your family and friends. Laugh be merry and have a wonderful relaxed Thanksgiving day and know that there is no such thing as perfect.

11/4/10

Blueberry Swirl French Toast


My son has been drawing pictures of blueberries in his journal at school and professing his love for blueberries at home. In reality he doesn't really like blueberries (he literally chokes them down) but since he likes them I am taking advantage of this moment and loading him up with blueberry goodness.  

I couple of weeks ago I noticed that Trader Joe's had this delicious looking blueberry swirl bread. I grabbed a loaf and it sat in my fridge for a couple of days and then I made a batch of french toast. I also pulled some frozen blueberries out of the freezer and made a little blueberry syrup.

When I make french toast, pancakes or waffles I like to cook a bunch and freeze the extra. So with the french toast make the whole loaf of bread then flash freeze the slices and put them in a gallon size ziplock for a quick weekday breakfast treat!

Blueberry Swirl French Toast
recipe: Simply Fit Mama 
  • 1 loaf of Trader Joe's blueberry swirl bread
  • 4-6 eggs
  • 1/4 cup milk
  • 1/2 tbsp cinnamon
  • 2 tsp pure vanilla extract
  • Coconut oil or canola, for the skillet
In a shallow dish whisk together the eggs, milk, cinnamon, vanilla until combined. 

Heat your skillet on medium heat.

Cut the the bread slices on the diagonal or however you like your french toast. Dip the bread in the egg mixture: top, bottom and sides.

Add a little oil to your skillet then add a couple of the egg dipped bread sliced to the pan. Cook for a couple minutes on each side until lightly browned.

Serve warm. Any leftover slices can be flash frozen and then reheated by popping in the toaster or in the microwave, I prefer the toaster because it give it a crisp outside with a soft inside.

Blueberry Syrup
recipe: Simply Fit Mama
  • 1 cup frozen or fresh blueberries
  • 1/4 cup sweetener, pure maple syrup, raw sugar, agave nectar, apple juice concentrate, etc
  • 1/4 cup water
In a small saucepan heat blueberries, sweetener and water on medium-high heat. You can mash up some of the blueberries with a fork or potato masher. Let the mixture come to a slight boil and then let it simmer until thickened.

I sprinkle the tops with a little powdered sugar, the kiddos love the "snow".

Related Posts with Thumbnails